Wednesday, 20 February 2013

Pin It Do It Challenge - Sparkly necklace

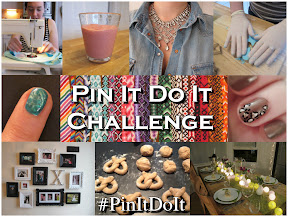
Most of the #PinItDoIt challenges we've posted so far have been projects or nail art.  But we're not just interested in doing projects, we pin A LOT of things from recipes to outfits to home ideas (as well as a lot of craft ideas!) that we love and want to inspire ourselves, and you, to turn the pins into reality!  Here's an outfit idea I tried out recently...

I do love a bit of bling and have quite a few pins demonstrating how a super sparkly necklace doesn't have to be kept for a special occasion or evening out.


Source: theyallhateus.com via Bex on Pinterest


Source: indulgy.com via Bex on Pinterest


I paired my sparkly Zara necklace with my H&M denim shirt, H&M stripy vest, pink M&S skinny jeans and Office boots. (And Desigual coat I need to sew buttons back on to!)  Necklace also seen here to glam up a semi-casual outfit!


Has anyone else been wearing a bit of bling for daytime?  Any other Pinterest outfit inspirations you want to share?  Visit our #PinItDoIt page for details on how to submit your projects...
Olive Dragonfly Pin It Do It

My Mum liked Monday's idea so much, she's already done it too!  She sent me this picture yesterday, please bear in mind that she has a giant craft room and clearly a lot more punches than I do (including a dragonfly of course - she did make all our invitations, menus, place names, table plan and other stationery for our wedding!) so her efforts are far superior!  ;)


Monday, 18 February 2013

Pin It Do It Challenge - Ombre Dragonfly Art Cards

Sometimes you see a pin and you just can't help but do it (and blog it) straight away!  I had a quick look at my Pinterest feed on Sunday morning and saw an alert from Sarah about a pin she thought I'd like.  She was right!

It took me a long time to find the original source to credit the idea - the pin I saw first went to a random jpeg so I did a reverse google image search which lead me to a facebook page, to another facebook page, to a blog, to someone's instagram to their blog which seems to have the original idea!


I absolutely LOVED the idea so went to Homebase to get a few Dulux paint swatches.  (They'll also come in useful when I can convince the husband we should redecorate our bedroom since I got all my favourite colours of course!)  I already had a dragonfly punch we used for the wedding favours/place names (of course!) and had some cards left over from when I used to sell my photos at craft fairs and made photo cards.  I also had a flash of inspiration when I made the olive green one and remembered I had some of the glitter paper left so added that in for a bit of a twist.


It's so easy, just punch out your shape from each of the colours (I used a combination of two strips to get more of a range) taking care not to punch where the words are and glue them onto card in the pattern you want.  I had pre-folded cards from ebay which came with envelopes as well.  I think I bought the punch on ebay too but you can also get them from lots of on-line craft shops.  I've punched out some smaller dragonflies to place one in the corner of each envelope as well.


I love them!  I've already punched out loads more dragonflies but haven't glued them on yet.  I have a few square cards to try it with as well but I really like the long thin ones.  I also trimmed a strip I'd punched out and glued that on to a card...


I also have a heart punch somewhere which I used to make one of Nik's wedding presents but I can't find it at the moment!  When I do, I will be doing some similar designs with hearts, perfect for Valentine's day next year!  I've also tried doing some all in a straight line down the middle but need to spend a bit longer on these so they're perfectly straight when I glue them (i.e. not when I'm sitting on the sofa watching a film!) and I plan to make a big one to frame with a whole rainbow of ombre colours, possibly in stripes or concentric circles, I'll have to have a play.  :)

You can find more #pinitdoit challanges by clicking on this badge.  We're starting up a new linky for others to join in posting theirs too!

Olive Dragonfly Pin It Do It

P.S. We now have a facebook page!  I'll be keeping it up to date with photos from Craft Club and Pin It Do It projects.  If you try out any of the projects you see here, send them in and we'll share them on the facebook page.  

Friday, 15 February 2013

Zizzi Opening Night - what I wore

I'm afraid that despite it being my favourite new feature (and seems to be very popular with you guys too), since Splurge Vs Save takes me SO long to put together, I've decided to make it a bi-monthly thing instead of every Friday.  Instead, here is just a straightforward outfit post...

So as you know, I was very lucky to be invited along to a restaurant opening with Sarah at the weekend and we had a wonderful time!  As it was more of an occasion than just your usual dinner, we both got dolled up - and just as well as we were being snapped on the way in and inside!  (I'll let you know if our photo shows up anywhere!)

Here are my own photos of my outfit that evening...


The dress is from Miss Selfridge and came with the pinky-gold metallic belt.  I wore my infamous pink lipstick and twisted my short hair up and pinned it randomly.  I didn't have time to do my nails.


I took my favourite new bag from my in-laws for Christmas and wore my fab floral M&S tights with gold super comfy M&S shoes.  My earrings were also from my in-laws, brought back from Sri Lanka for my birthday!


I was planning on wearing the dress with my #Blogmanay sequin cardigan but when I put it on, it didn't look right so I planned to wear my blazer instead.  In the end I forgot that anyway so just had my leather jacket on.


Burgundy & floral

Thursday, 14 February 2013

Pin It Do It Challenge - Felt Heart Top

I have SO many #PinItDoIt challenges to share so although it's usually a Wednesday thing, here's a bonus Valentine's Day themed one.  I made this for Anna for #heartswap and I love it so much I'm planning to make one for myself, perhaps it should be a future Craft Club project?!


As I was already a bit close to the budget for #heartswap, I went with a vest rather than a sweatshirt.  I could only find a few options of felt colours as I needed it quickly (I've since found some on-line suppliers) so it wasn't quite the ombre design I planned but I think it worked well.  Anna had said she likes blue, aqua and turquoise in her questionnaire so I was glad I managed to get one turquoise colour at least and combined it with greys and black.  I managed to get a nice soft aqua vest from H&M for just £3.99!


I pinned the hearts on and decided on the final arrangement before sewing them in place along the centre of each heart so the sides were free to stand up.


It was Nik's idea to add the little heart to the bottom corner!  He's a clever boy.  :)  I was very chuffed with the final result.  I hope she likes it!


Don't forget you can send in your own #PinItDoIt projects for us to share, just follow the link by clicking on the badge below for details...

Olive Dragonfly Pin It Do It

Wednesday, 13 February 2013

Pin It Do It Challenge - DIY Dip Dye Clothing

Here's Roz's first #PinItDoIt post, don't forget if you've tried any Pinterest inspired projects you can send them in to us!  :)

It was our screen printing classes last year that started my interest in creating bespoke items of clothing.  When I saw the pin below on Pinterest, I knew I wanted to do something similar straight away!  Purple is my favourite colour and I had been considering using the same shade of Dylon dye - Intense Violet - as the original pinner for a while.  So I bit the bullet and ordered some dye on ebay.  I even had a cotton v-neck tshirt in my wardrobe that I thought would be perfect to try the technique out on.


After talking to my friend Lauren, who was planning on using a similar technique using red dye on a white jumper, I thought it might be a more wearable option for winter into spring to also create a jumper.  We decided to try it out on Saturday and Lauren popped into Primark to buy some cheap jumpers as we were scared it might not work out!  Luckily she also remembered to bring the salt, as you need to dissolve 250g of salt into warm water before adding your 50g of Dylon dye.
So we prepared our workspace (my bathroom) with buckets, scales, spoons for stirring, a timer and followed the step by step instructions on the original pin.  The idea was to create the same 3 shades of colour on our finished items.


The actual process was easy enough and keeping the jumper on a hanger ensured more control over how much material ended up in the dye.  The colour of our jumpers looked great through out and we were very excited to see what the finished result would be!


However, as we followed the final steps (rinsing our garments in cold water before washing in the machine) we quickly realised that things had not worked out as planned :(
Our jumpers had only taken a hint of the colour, with mine looking a pale lilac and Lauren's a pale pink.


It took us a few minutes to work out what was wrong, originally thinking that it might have been that we only used half of the packet of dye (because we were in effect only looking to dye half of our material) but as we halved the water and salt quantities we thought we had the science bit correct.  It turns out that our epic fail was our cheap jumpers!  They were 100% acrylic and the dye is for use with cotton, wool, silk, polyester mix etc.
So in reality this is not quite the excited and happy blog post I had hoped it would be, but I thought I would share it with you all anyway as a warning to always read instructions on packets!!  Has anyone attempted anything similar in the past?  Or fancy trying out this technique, using the correct materials of course?

Roz xx

Olive Dragonfly Pin It Do It
Related Posts Plugin for WordPress, Blogger...

TOTS100

TOTS100 - UK Parent Blogs
TOTS100