by Bex

Less than 2 weeks to go!
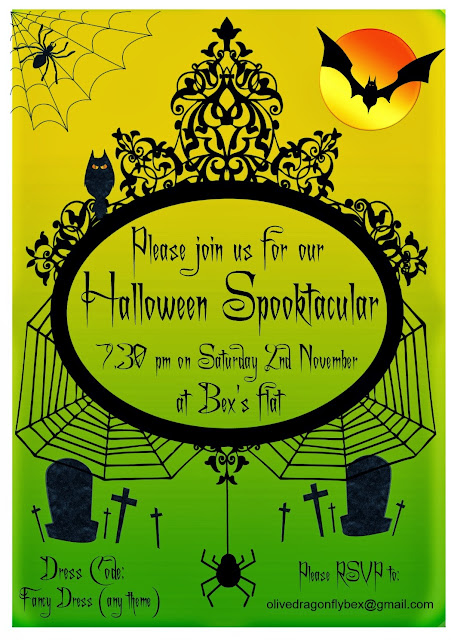
If you are one of the wonderful people who got in touch to request an invite to #ODP2 (and if you aren't, there's still time, just email me!) you should have received your 'proper' invitation by now. Mum designed me some fab invitations which I planned to print and send out but then I had a different idea, born when making my bunting for the party and decided to make them myself. I had a lot of fun making them out of the scraps from my real bunting so I thought I'd share them here.
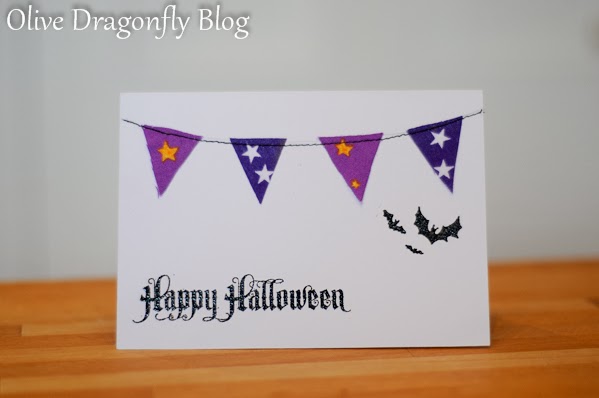
No two were the same with the mixture of fabrics and stamps. The fabrics came from eBay and Mandors. I bought the Halloween themed stamps from Glitter Pot and they arrived super quickly. I bought 2 sheets of Tim Holtz Halloween stamps which can be mounted on an acrylic block (also bought from Glitter Pot) and I love them all!
I particularly love the rather camp looking skeleton and placed him inside most of the invites and on the envelopes where he fit next to the address along with bats, cats, skulls and spiders...
With the triangles being so tiny, it wasn't really feasible to hem them (nor did I have time!) so some of them did fray a little but for cards I decided that didn't matter.
I then used the stamps to add wording and the odd spider, owl or group of bats before embossing them...

I didn't want to add too much detail as I wanted the bunting to stand out. I made a specific starry purple one for Roz and an owl themed one for Anna K...
Inside I went for the quick and easy option of printing out the words and cutting and sticking them as I was getting a bit short of time to finish and post them! I found some great Halloween fonts online, the main one was called PR Uncial Creepy but this didn't have numbers or symbols so I paired it with A Lolita Scorned (which as the main font was a bit fussy). As I was in a hurry to get them finished I printed the words on to paper (I fit 8 sets onto an A4 sheet) which I then just cut out and stuck into the cards rather than printing directly onto each card. I also used the same fonts in red for the envelopes which is why it took me so long to print them all as I had to switch between the two fonts.
And just because I was so proud of them and couldn't choose a favourite, here are a few more designs...
There were a few I loved too much to part with so I'm going to frame them in cheap black Ikea frames to use as additional Halloween decor at the party!
I spent time at work between patients, 3 lunch hours and a few evenings at home making these but I hope you'll agree that they were worth it!?

Less than 2 weeks to go!
If you are one of the wonderful people who got in touch to request an invite to #ODP2 (and if you aren't, there's still time, just email me!) you should have received your 'proper' invitation by now. Mum designed me some fab invitations which I planned to print and send out but then I had a different idea, born when making my bunting for the party and decided to make them myself. I had a lot of fun making them out of the scraps from my real bunting so I thought I'd share them here.
 |
| Awesome invite designed by Mum! |
No two were the same with the mixture of fabrics and stamps. The fabrics came from eBay and Mandors. I bought the Halloween themed stamps from Glitter Pot and they arrived super quickly. I bought 2 sheets of Tim Holtz Halloween stamps which can be mounted on an acrylic block (also bought from Glitter Pot) and I love them all!
I particularly love the rather camp looking skeleton and placed him inside most of the invites and on the envelopes where he fit next to the address along with bats, cats, skulls and spiders...
 |
| Posted in the rain! |
So, to make the actual invites was pretty simple but time consuming. I cut triangles out of the scraps of fabric I had left over (trying to place my template where the best parts of the prints were - using greaseproof paper was the trick here so I could see through it to the pattern) and stuck them on to cards with a spot of glue before using my sewing machine to sew along a line across the top in black thread to make miniature bunting. I think they're so cute! I spent a long time cutting out the triangles using the best sections of fabrics to make them look their best...
With the triangles being so tiny, it wasn't really feasible to hem them (nor did I have time!) so some of them did fray a little but for cards I decided that didn't matter.
I then used the stamps to add wording and the odd spider, owl or group of bats before embossing them...

I didn't want to add too much detail as I wanted the bunting to stand out. I made a specific starry purple one for Roz and an owl themed one for Anna K...
 |
| I wasn't really sure about the orange ink so only made one in orange |
 |
| And the spider web didn't look quite right as it just ended above the bunting |
There were a few I loved too much to part with so I'm going to frame them in cheap black Ikea frames to use as additional Halloween decor at the party!
I spent time at work between patients, 3 lunch hours and a few evenings at home making these but I hope you'll agree that they were worth it!?


10 comments:
I am really impressed, these are amazing! You have done an amazing job, well done :)
Best invitation I have ever received. Fact.
These look amazing - wish I was able to make it!
They are ace - I particularly like the waving skeleton bunting near the end!
K x
Loving the invites, they turned out really well. Not surprised you want to keep a few! Mum xx
Loving the invites, they turned out really well. Not surprised you want to keep a few! Mum xx
You're right to be proud - they really are incredibly amazing.
PHUKET PATONG BANGLA ROAD, LadyBoy
Photos and Youtube Clip Here!! Patong's Bangla Road.
Largest ladyboy extravaganza on earth
Aphrodite Cabaret Show is our brand new pearl of Andaman Sea. Let's go!!! PHUKET
These look fab. I really wish I was able to make this!!
These look fab. I really wish I was able to make this!!
Post a Comment